Easy Chocolate Fudge Recipe With Marshmallow Cream
Classic Marshmallow Fluff Fudge is one of those nostalgic recipes that so many people love. It's smooth, creamy, and a wonderfully decadent, indulgent dessert.
I hear a lot of people say they have tried numerous times and failed to make a delicious, creamy fudge. I've made this fudge at least a bazillion times and I've never had an issue getting perfectly smooth chocolate fudge every time.
As long as you follow a few basic steps, you'll get perfect, delicious, homemade fudge every time.
Steps to getting perfect homemade fudge
First, measure out all your ingredients and get them set up and ready to go. You're going to spend a lot of your time stirring and you won't be able to stop and measure out your half & half or dig in your pantry for the right nuts.
The whole process of making homemade fudge is basically melting a whole bunch of things together at the right temperature. At least in my experience.
Start melting the butter on medium/low heat. One of the keys is to not have the heat up higher than necessary on ANY of these steps!
After the butter is melted, add your half and half. (I didn't have packaged half and half so I just made mine from whole milk and cream).
Pour in the sugar and melt. Once the sugar is melted, turn the heat up to medium/medium high. Get comfortable. You're going to be stirring for a while. Stir your sugar mixture constantly. When it begins to boil, use a candy thermometer or a hand held instant read (paid link) to monitor the temperature (personally, I prefer the instant read because we use it for a lot more than just candy).
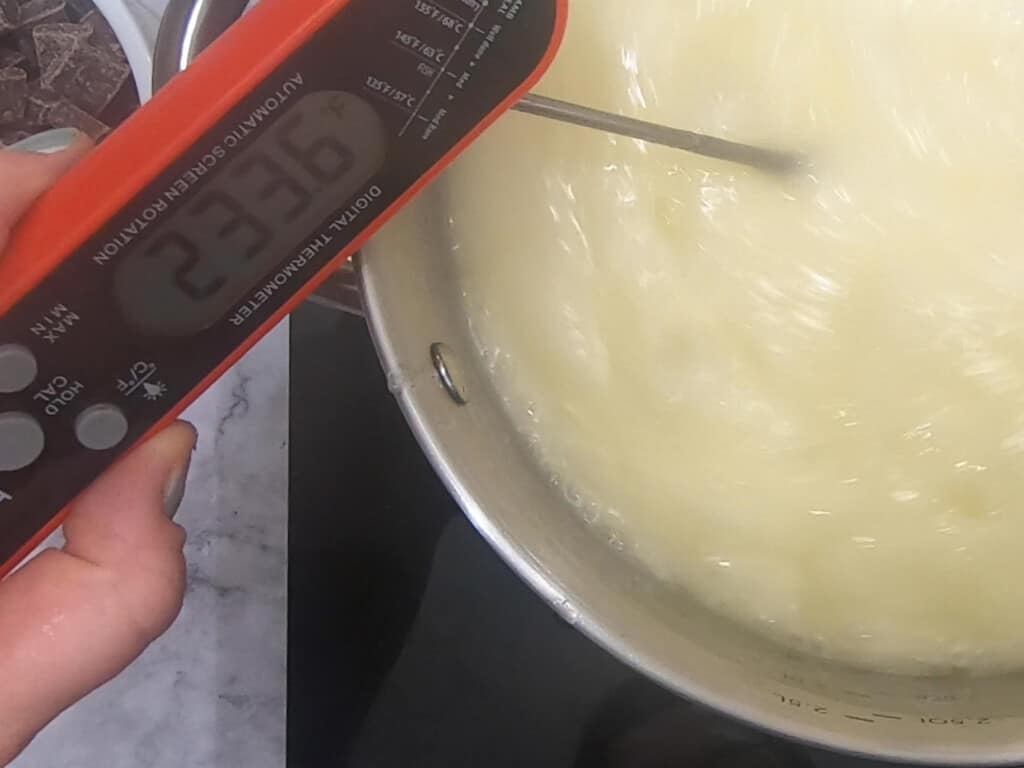
When the sugar hits 234F, remove it from the heat immediately. You do not want it to get too hot! Heating sugar to varying degrees has very different effects on how it behaves. Too much heat and your fudge will be dense and grainy. Not enough and it won't set. This is a great article to read if you want to know more about the candy making temperatures.
Melting in the chocolate and marshmallow fluff
Once you've reached temperature and removed it from the heat, begin to pour in the chocolate chunks a few at a time. Melt completely and continue to add more chunks.
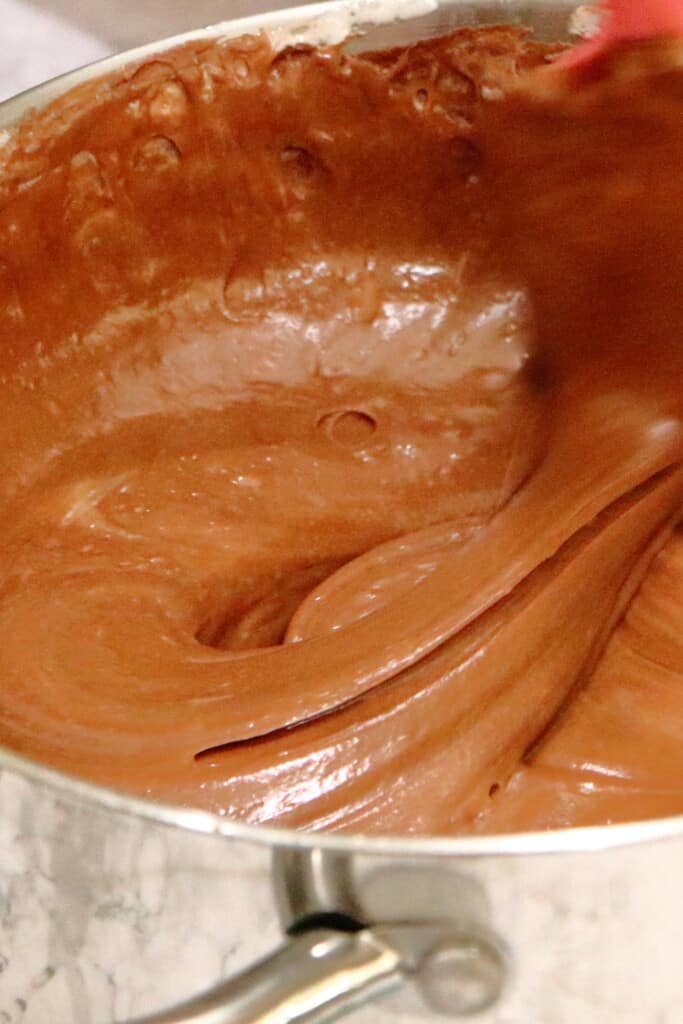
When you are almost done with the chocolate, or after all the chocolate is melted in, add the vanilla. You don't want to add the vanilla to the extremely hot chocolate. It will burn off right away. So wait until the temperature has come down some.
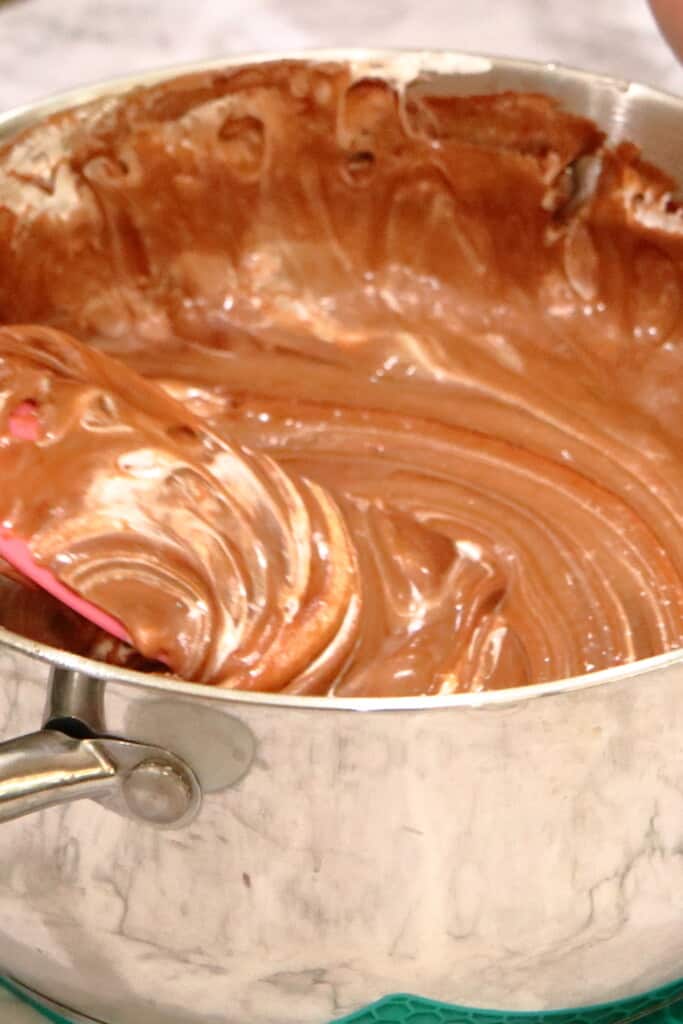
After the chocolate is completely smooth, scrape in the marshmallow fluff. These silicone spatulas (paid link) are perfect for all of this. Not only do they get every little scrap, but they are one piece so the top doesn't pull off.
Stir until completely mixed in.
Are you tired of stirring? Yeah I was too.
After all of your marshmallow fluff is mixed in, it's time to add the nuts (if you want them) and chill!
Chilling your fudge
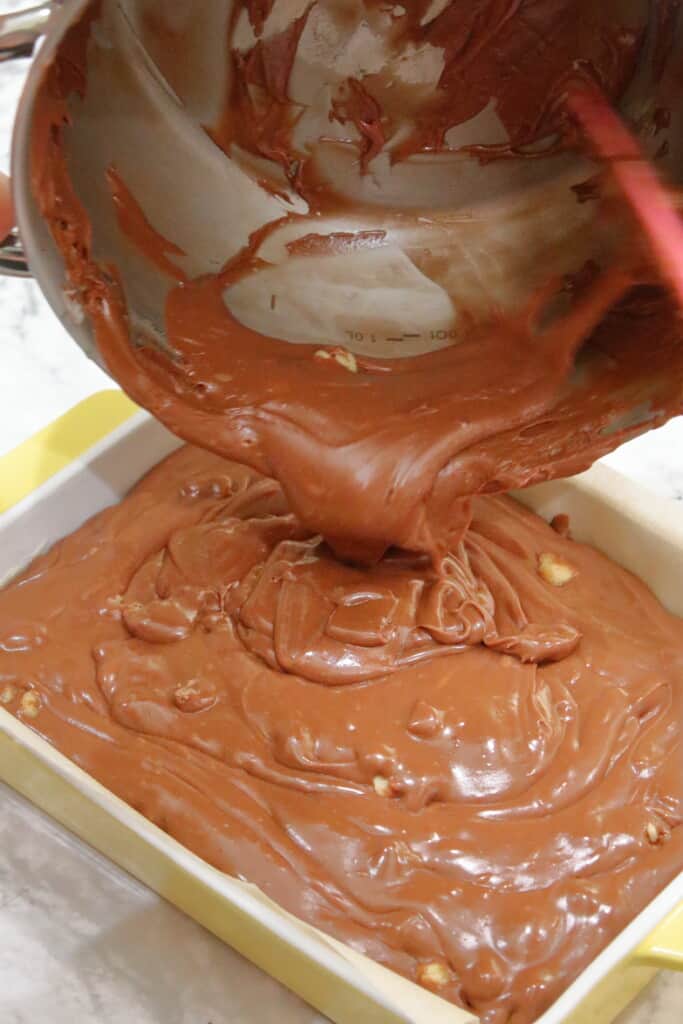
To chill your marshmallow fluff fudge, you'll need to pour it into a prepared baking pan. I find it best to line it with parchment paper with enough extra to come up the sides so you can pull it out a little easier.
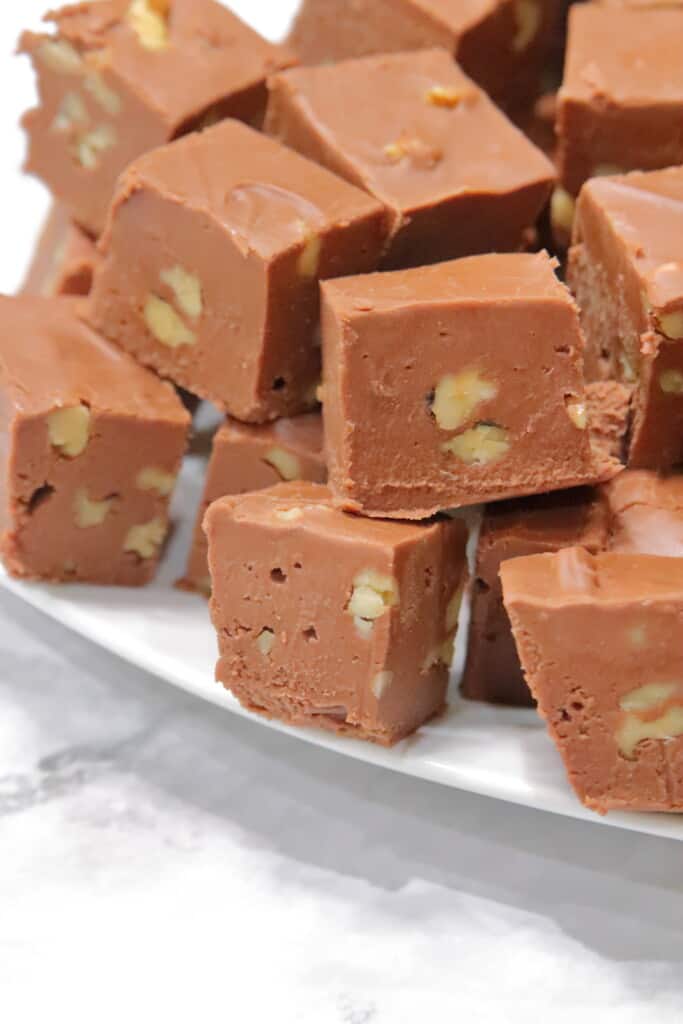
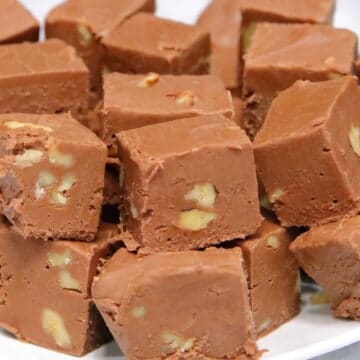
Truth be told, there's no rule saying that you have to be able to pull it out of the container to cut it. Growing up, We just left it in there and cut each piece as we wanted it. But if you want to cut the whole thing at once, use parchment paper to pull it out and cut it into those perfect little squares.
As for pan size, that depends on how deep you want the homemade fudge to be. I opted for a 7×9 because I wanted mine nice and thick. You can do and 8×8, or a 9×9. I wouldn't go much larger than that though.
Once you have smoothed it into a pan, chill in the refrigerator for about 3-4 hours. You want to make sure it is cooled all the way through.
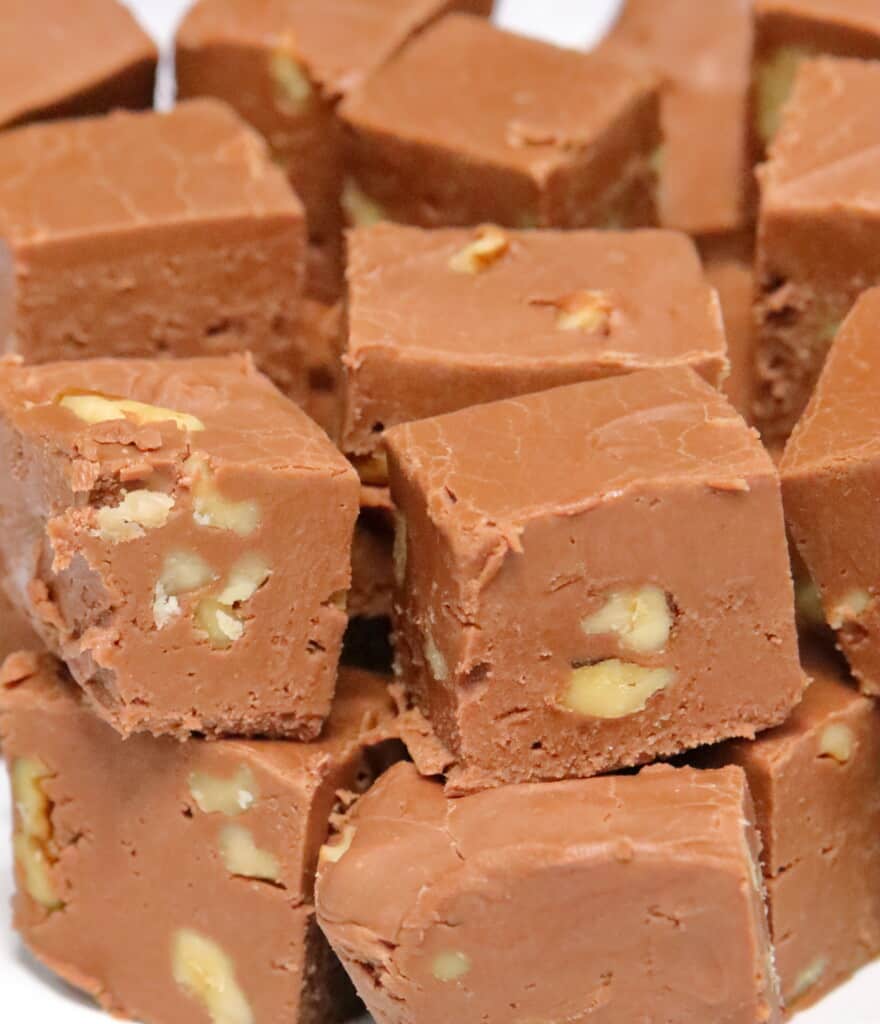
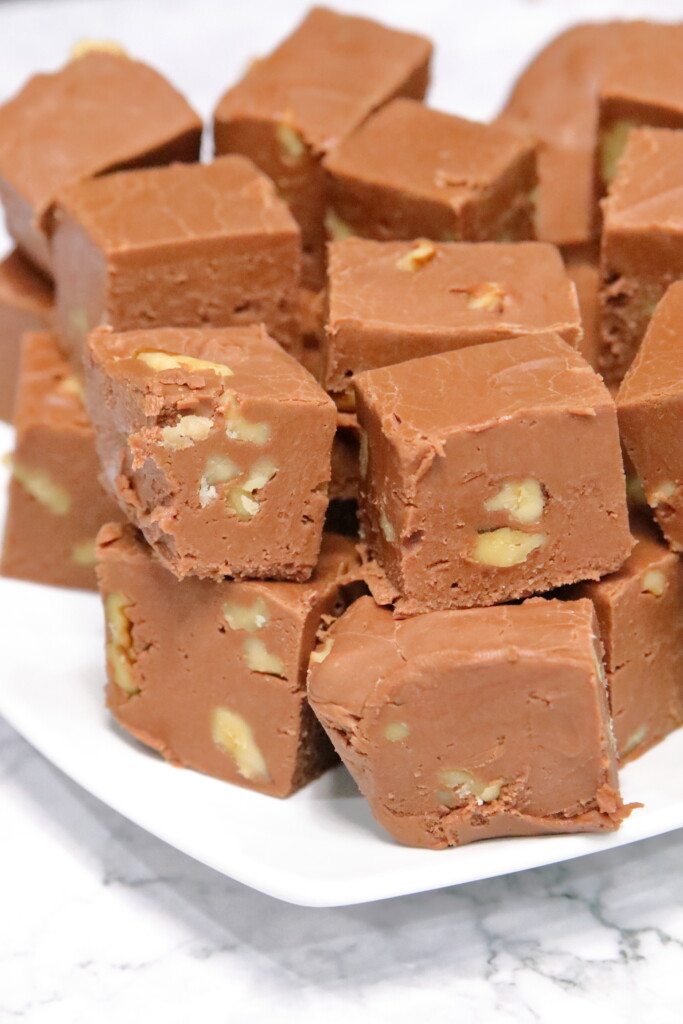
Once it's cooled, you're done! Cut that delicious marshmallow fluff fudge and dig in!
Enjoy!
Looking for some more decadent chocolate desserts? Check these out!
- No Bake Smores Cheesecake
- Peanut Butter Chocolate Cupcakes
- Cookies and Cream Cupcakes
Classic Marshmallow Fluff Fudge
Classic Marshmallow Fluff Fudge is one of those nostalgic recipes that so many people love. It's smooth, creamy, and a wonderfully decadent, indulgent dessert.
Print Pin Rate
Servings: 32 pieces
- 12 ounces semi sweet chocolate chips
- 7 ounces Jet Puffed Marshmallow Creme
- 1.5 sticks butter ¾ cup
- 3 cups granulated sugar
- ¾ cup half and half
- 1.5 tsp vanilla extract
- 1 cup chopped walnuts
-
Over medium low heat, melt butter. Add half and half. Mix well.
-
Pour in sugar and mix until melted. Turn up heat to just above medium, maybe medium high depending on how hot your stove gets. You don't want too much heat. Bring sugar mixture to a boil. Stir constantly. DO NOT STOP STIRRING.
-
When the mixture begins to boil, use a candy thermometer or a handheld instant read thermometer to monitor temperature. Stir constantly until the temperature reaches 234°F. Don't let it go over! This took me about 7-8 minutes of boiling and stirring to reach this point. Be patient!
-
Immediately remove from heat. Keep stirring. Pour in chocolate chips little by little. Completely melt each batch.
When most of the chocolate is melted, stir in vanilla.
-
Pour in marshmallow cream and mix until fully incorporated. Add nuts. Mix in.
-
In a small cake pan (9×9, 8×8, 7×9) lined with parchment paper, pour in fudge mixture. Smooth top. Place in refrigerator and cool for about 3-4 hours.
-
Remove from pan. Cut and enjoy!
tepperwiffistandes.blogspot.com
Source: https://systemofabrown.com/classic-marshmallow-fluff-fudge/
0 Response to "Easy Chocolate Fudge Recipe With Marshmallow Cream"
Post a Comment